Guide to the LilyPad Arduino
To get started with the LilyPad Arduino, follow the directions for the Arduino NG on your operating system (Windows, Mac OS X, Linux. Connecting the LilyPad Arduino is a bit more complicated than a regular Arduino board (see below for instructions and photos).
The LilyPad Arduino is more fragile and easy to break than a regular Arduino board. Don't connect more than 5.5 volts to the + tab or reverse the power and ground pins of your power supply, or you will very likely kill the ATmega on the LilyPad Arduino. You can't remove the ATmega, so if you kill it, you need a new LilyPad.
Note: More information about getting started with the LilyPad Arduino can be found here.
Connecting the LilyPad Arduino
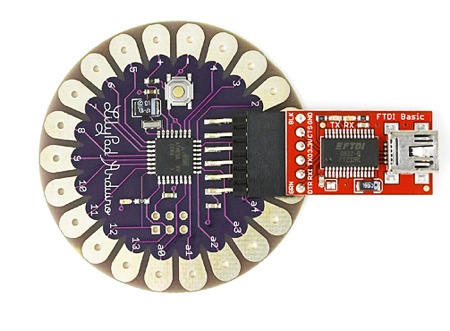
To program the LilyPad Arduino, you need to connect it to your computer. The SparkFun FTDI Basic Breakout plugs into the 6-pin male header on the newest version of the LilyPad. Use a USB MiniB cable to connect the FTDI basic breakout to your computer. You can also use an FTDI USB-TTL Serial cable.
To connect earlier versions of the board or for information on other connection options see the LilyPad Arduino tutorial on Leah's website
Sewing the LilyPad Arduino
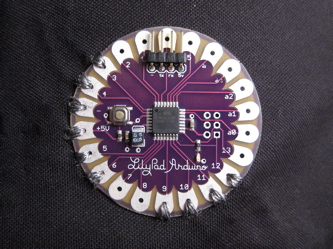
The hole on each tab of the LilyPad is large enough for a sewing needle to pass through. You can make both electrical and physical connections with stitching in conductive thread. Sew through the holes several times to insure good contact. Here's a picture showing a sewn LilyPad:
See the LilyPad Arduino tutorial on Leah's website for more information about building a working wearable. See SparkFun for more stitchable modules that you can use with your LilyPad Arduino.
The text of the Arduino getting started guide is licensed under a Creative Commons Attribution-ShareAlike 3.0 License and is based on the Arduino reference. Code samples in the guide are released into the public domain.