Getting Started w/ Arduino on Windows
This document explains how to connect your Arduino board to the computer and upload your first sketch.
On this page... (hide)
1 | Get an Arduino board and USB cable
In this tutorial, we assume you're using an Arduino Uno, Arduino Duemilanove, Nano, or Diecimila. If you have another board, read the corresponding page in this getting started guide.
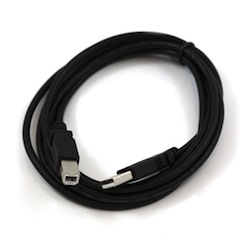
You also need a standard USB cable (A plug to B plug): the kind you would connect to a USB printer, for example. (For the Arduino Nano, you'll need an A to Mini-B cable instead.)

2 | Download the Arduino environment
Get the latest version from the download page.
When the download finishes, unzip the downloaded file. Make sure to preserve the folder structure. Double-click the folder to open it. There should be a few files and sub-folders inside.
3 | Connect the board
The Arduino Uno, Mega, Duemilanove and Arduino Nano automatically draw power from either the USB connection to the computer or an external power supply. If you're using an Arduino Diecimila, you'll need to make sure that the board is configured to draw power from the USB connection. The power source is selected with a jumper, a small piece of plastic that fits onto two of the three pins between the USB and power jacks. Check that it's on the two pins closest to the USB port.
Connect the Arduino board to your computer using the USB cable. The green power LED (labelled PWR) should go on.
4 | Install the drivers
Installing drivers for the Arduino Uno with Windows7, Vista, or XP:
- Plug in your board and wait for Windows to begin it's driver installation process. After a few moments, the process will fail, despite its best efforts
- Click on the Start Menu, and open up the Control Panel.
- While in the Control Panel, navigate to System and Security. Next, click on System. Once the System window is up, open the Device Manager.
- Look under Ports (COM & LPT). You should see an open port named "Arduino UNO (COMxx)"
- Right click on the "Arduino UNO (COmxx)" port and choose the "Update Driver Software" option.
- Next, choose the "Browse my computer for Driver software" option.
- Finally, navigate to and select the Uno's driver file, named "ArduinoUNO.inf", located in the "Drivers" folder of the Arduino Software download (not the "FTDI USB Drivers" sub-directory).
- Windows will finish up the driver installation from there.
See also: step-by-step screenshots for installing the Uno under Windows XP.
Installing drivers for the Arduino Duemilanove, Nano, or Diecimila with Windows7, Vista, or XP:
When you connect the board, Windows should initiate the driver installation process (if you haven't used the computer with an Arduino board before).
On Windows Vista, the driver should be automatically downloaded and installed. (Really, it works!)
On Windows XP, the Add New Hardware wizard will open:
- When asked Can Windows connect to Windows Update to search for software? select No, not this time. Click next.
- Select Install from a list or specified location (Advanced) and click next.
- Make sure that Search for the best driver in these locations is checked; uncheck Search removable media; check Include this location in the search and browse to the drivers/FTDI USB Drivers directory of the Arduino distribution. (The latest version of the drivers can be found on the FTDI website.) Click next.
- The wizard will search for the driver and then tell you that a "USB Serial Converter" was found. Click finish.
- The new hardware wizard will appear again. Go through the same steps and select the same options and location to search. This time, a "USB Serial Port" will be found.
You can check that the drivers have been installed by opening the Windows Device Mananger (in the Hardware tab of System control panel). Look for a "USB Serial Port" in the Ports section; that's the Arduino board.
5 | Launch the Arduino application
Double-click the Arduino application.
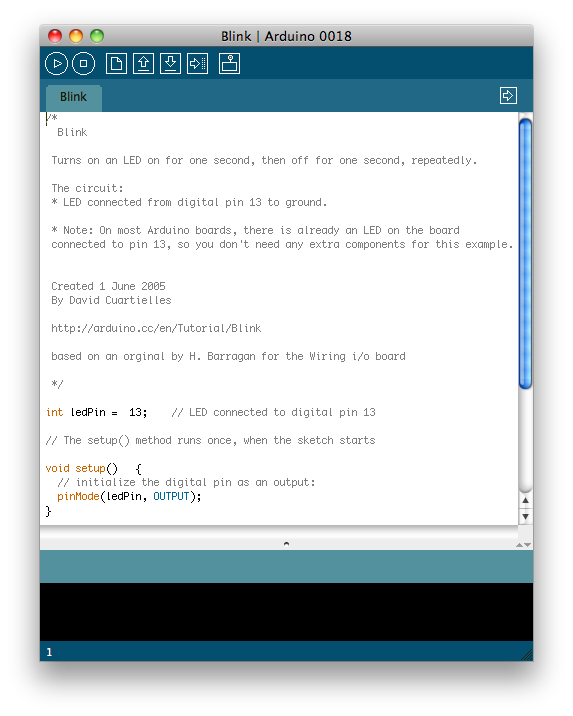
6 | Open the blink example
Open the LED blink example sketch: File > Examples > 1.Basics > Blink.
7 | Select your board
You'll need to select the entry in the Tools > Board menu that corresponds to your Arduino.
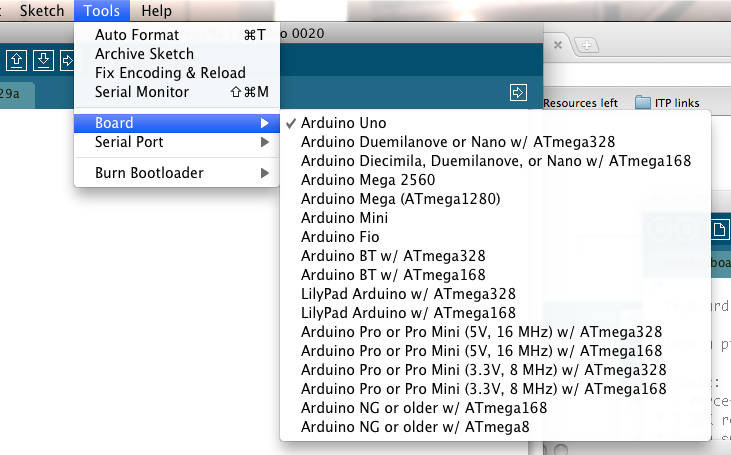
Selecting an Arduino Uno
For Duemilanove Arduino boards with an ATmega328 (check the text on the chip on the board), select Arduino Duemilanove or Nano w/ ATmega328. Previously, Arduino boards came with an ATmega168; for those, select Arduino Diecimila, Duemilanove, or Nano w/ ATmega168. (Details of the board menu entries are available on the environment page.)
8 | Select your serial port
Select the serial device of the Arduino board from the Tools | Serial Port menu. This is likely to be COM3 or higher (COM1 and COM2 are usually reserved for hardware serial ports). To find out, you can disconnect your Arduino board and re-open the menu; the entry that disappears should be the Arduino board. Reconnect the board and select that serial port.
8 | Upload the program
Now, simply click the "Upload" button in the environment. Wait a few seconds - you should see the RX and TX leds on the board flashing. If the upload is successful, the message "Done uploading." will appear in the status bar. (Note: If you have an Arduino Mini, NG, or other board, you'll need to physically present the reset button on the board immediately before pressing the upload button.)

A few seconds after the upload finishes, you should see the pin 13 (L) LED on the board start to blink (in orange). If it does, congratulations! You've gotten Arduino up-and-running.
If you have problems, please see the troubleshooting suggestions.
You might also want to look at:
The text of the Arduino getting started guide is licensed under a Creative Commons Attribution-ShareAlike 3.0 License and is based on the Arduino reference. Code samples in the guide are released into the public domain.